[ASP.NET Core MVC][Vue3] 動態列表及修改教學
我們在開發表單維護的時候,比較常見的做法是每一個動作就會同時更新資料表,例如一次新增或修改一筆資料,按下存檔時就會寫入資料庫。
這樣的做法單純直覺,程式寫起來較簡單,但實際操作會有速度較慢的問題,每次切換頁面和寫入資料庫都會消耗一些時間。
例如我之前範例就是以此做法,可參考這裡:後台編輯頁面教學
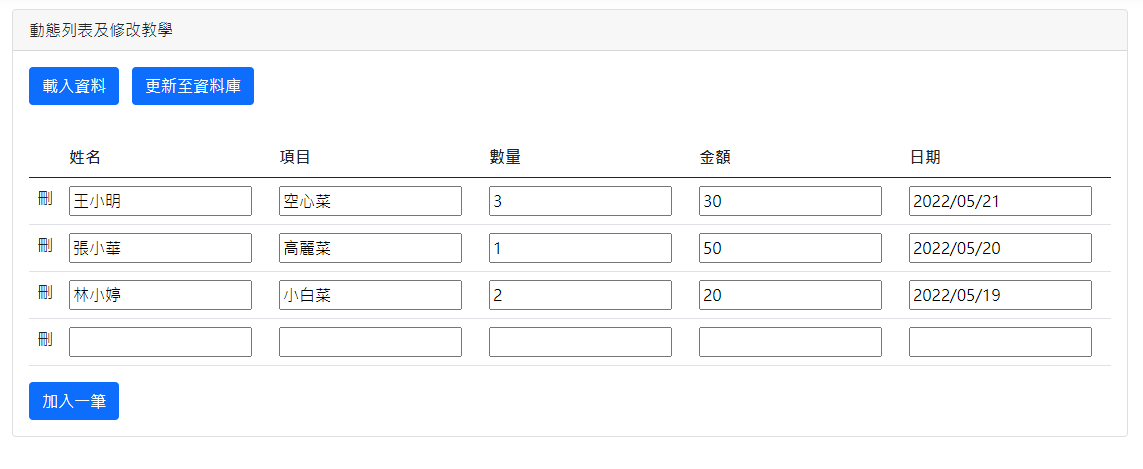
今天我提供一個在前端動態新增、修改和刪除的範例,在前端可以隨時增加或減少筆數以及在表內修改資料,等到完整輸入完之後,再一次整批寫入至資料表。
Contents
建立專案
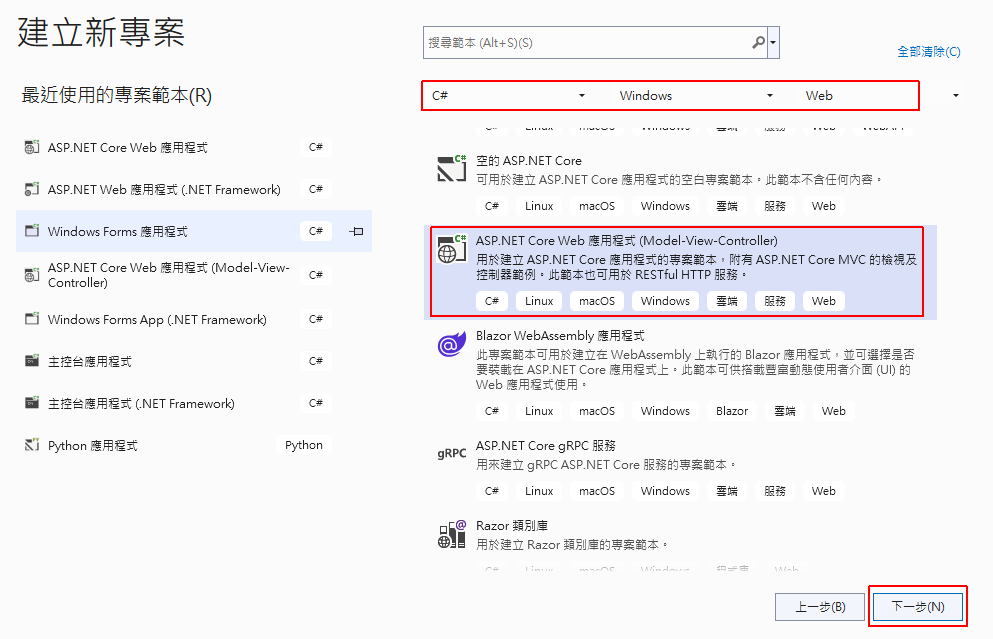
開啟 Visual Studio 2022,建立新專案為「ASP.NET Core Web 應用程式 (Model-View-Controller)」。
輸入專案名稱、路徑,架構選擇「.NET 6.0」版本,按下「建立」就會建立此專案。
加入 Vue3 套件
Vue3 是前端控制欄位的框架類別庫,打開 \Views\Shared\_Layout.cshtml 檔案,在下方 JavaScript 引用增加 Vue3 類別庫語法,順序的要求要放在 jQuery 之後才行。
<script src="https://unpkg.com/vue@3"></script>
當在 Layout 加上 Vue3 引用後,我們就可以在所有的頁面使用 Vue3 語法了,此引用語法來源可參考官方文件。
資料庫語法
使用 SQL Server 當作資料來源,我已經新增好資料庫了,接著以下語法新增 Table。
|
1 2 3 4 5 6 7 8 |
CREATE TABLE [dbo].[Sale]( [Pk] [int] IDENTITY(1,1) NOT NULL, [Name] [nvarchar](30) NOT NULL, [Item] [nvarchar](50) NOT NULL, [Qty] [int] NOT NULL, [Amount] [int] NOT NULL, [Date] [date] NOT NULL, PRIMARY KEY CLUSTERED ( [PK] ASC) ON [PRIMARY]) |
直接建立測試資料,可輸入以下測試資料語法。
|
1 2 3 |
insert into [dbo].[Sale]([Name],[Item],[Qty],[Amount],[Date]) values (N'王小明',N'空心菜',3,30,'2022-05-21 00:00:00') insert into [dbo].[Sale]([Name],[Item],[Qty],[Amount],[Date]) values (N'張小華',N'高麗菜',1,50,'2022-05-20 00:00:00') insert into [dbo].[Sale]([Name],[Item],[Qty],[Amount],[Date]) values (N'林小婷',N'小白菜',2,20,'2022-05-19 00:00:00') |
查詢頁面
這裡會開始寫程式碼,我設計一個頁面,執行「載入資料」後會讀取資料表內所有的資料。
我們直接修改 MVC 的預設首頁,開啟 \Views\Home\Index.cshtml,可以清空原有語法,然後貼上此語法:
|
1 2 3 4 5 6 7 8 9 10 11 12 13 14 15 16 17 18 19 20 21 22 23 24 25 26 27 28 29 30 31 32 33 34 35 36 37 38 39 40 41 42 43 44 45 46 47 48 49 50 51 52 53 54 55 56 57 58 59 60 61 62 63 64 65 66 67 68 69 70 71 72 73 74 |
<div id="app"> <div class="card"> <div class="card-header"> 動態列表及修改教學 </div> <div class="card-body"> <button type="button" class="btn btn-primary" v-on:click="Query()">載入資料</button> <button type="button" class="btn btn-primary">更新至資料庫</button> </div> <div class="card-body"> <table class="table"> <thead> <tr> <th style="width: 30px;text-align:center;"></th> <th>姓名</th> <th>項目</th> <th>數量</th> <th>金額</th> <th>日期</th> </tr> </thead> <tbody> <tr v-for="(item, index) in grid.list"> <td><a style="cursor: pointer;">刪</a></td> <td><input type="text" v-bind:id="'Grid_Name_' + index" v-model="grid.list[index].name" /></td> <td><input type="text" v-bind:id="'Grid_Item_' + index" v-model="grid.list[index].item" /></td> <td><input type="text" v-bind:id="'Grid_Qty_' + index" v-model="grid.list[index].qty" /></td> <td><input type="text" v-bind:id="'Grid_Amount_' + index" v-model="grid.list[index].amount" /></td> <td><input type="text" v-bind:id="'Grid_Date_' + index" v-model="grid.list[index].date" /></td> </tr> </tbody> </table> </div> </div> </div> @section scripts { <script> const app = Vue.createApp({ data() { return { grid:{ list:[] } } } , methods: { //載入資料 Query() { var self = this; // 組合表單資料 var postData = {}; // 使用 jQuery Ajax 傳送至後端 $.ajax({ url:'@Url.Content("~/Home/Query")', method:'POST', dataType:'json', data: { inModel: postData }, success: function (datas) { // 綁定列表 self.grid.list = datas.grids; }, error: function (err) { alert(err.status + " " + err.statusText + '\n' + err.responseText); } }); } } }); const vm = app.mount('#app'); </script> } |
Controller 語法
在 View 查詢後會呼叫 ~/Home/Query,在 \Controllers\HomeController.cs 加入以下 Action:
|
1 2 3 4 5 6 7 8 9 10 11 12 13 14 15 16 17 18 19 20 21 22 |
/// <summary> /// 載入資料 /// </summary> /// <param name="inModel"></param> /// <returns></returns> public IActionResult Query() { QueryOut outModel = new QueryOut(); outModel.grids = new List<SaleModel>(); // 資料庫連線字串 IConfiguration Config = new ConfigurationBuilder().AddJsonFile("appSettings.json").Build(); string connStr = Config.GetConnectionString("SqlServer"); //查詢 SQL SqlConnection conn = new SqlConnection(connStr); string sql = @"SELECT Pk,Name, Item, Qty, Amount, CONVERT(varchar(12),Date,111) AS Date FROM Sale ORDER BY PK"; outModel.grids = (List<SaleModel>)conn.Query<SaleModel>(sql);// 使用 Dapper 查詢 return Json(outModel); } |
建立 ViewModel
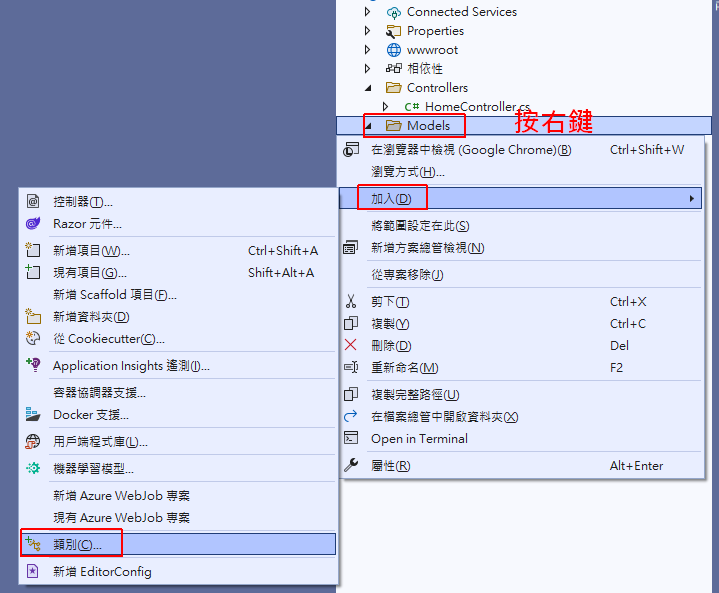
ViewModel 是用來規範 Controller 與 View 之間的欄位定義,在 Models 目錄按右鍵加入「類別」。
類別名稱為 “HomeViewModel”。
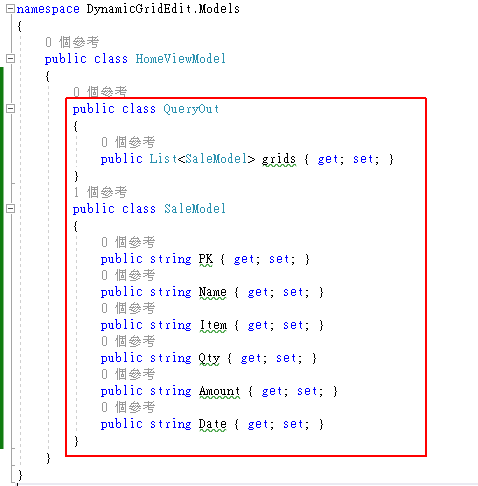
然後加入在 Controller 用到的 ViewModel。
|
1 2 3 4 5 6 7 8 9 10 11 12 13 14 |
public class QueryOut { public List<SaleModel> grids { get; set; } } public class SaleModel { public string PK { get; set; } public string Name { get; set; } public string Item { get; set; } public string Qty { get; set; } public string Amount { get; set; } public string Date { get; set; } } |
加入 Model 後,就可以在 Controller 引用此類別。
讀取 appsettings.json
我將資料庫連線放在 appsettings.json 裡面,打開 appsettings.json 後,加入以下連線字串。
|
1 2 3 |
"ConnectionStrings": { "SqlServer": "Data Source=127.0.0.1;Initial Catalog=Teach;Persist Security Info=false;User ID=test;Password=test;" } |
安裝 Dapper
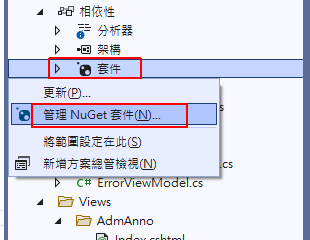
我資料庫互動物件使用微型 ORM 套件 Dapper,需要安裝 Dapper 才能使用。
開啟「相依性 > 套件 > 管理 NuGet 套件」。
搜尋「Dapper」,安裝此套件。
測試結果
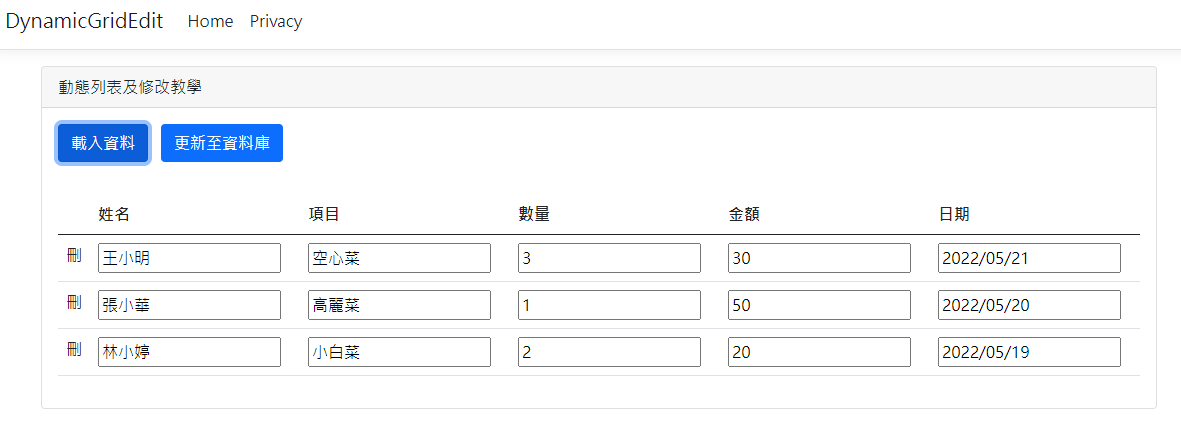
目前完成了查詢的結果,按下「載入資料」後,向 Controller 取得資料,然後顯示到列表上面。
動態新增、刪除
我們回到 \Views\Home\Index.cshtml,我們在查詢的時候已經回傳了陣列物件,只需要新增或刪除陣列,就可以調整畫面上的資料。
新增資料
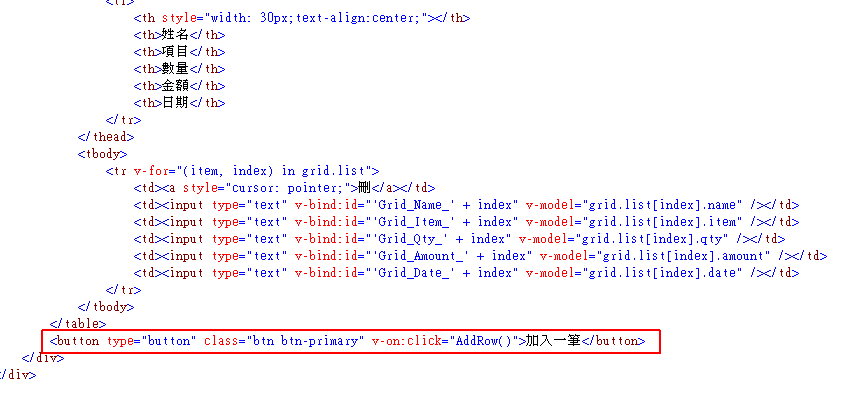
我們在 Table 下方增加一個按鈕:
<button type="button" class="btn btn-primary" v-on:click="AddRow()">加入一筆</button>
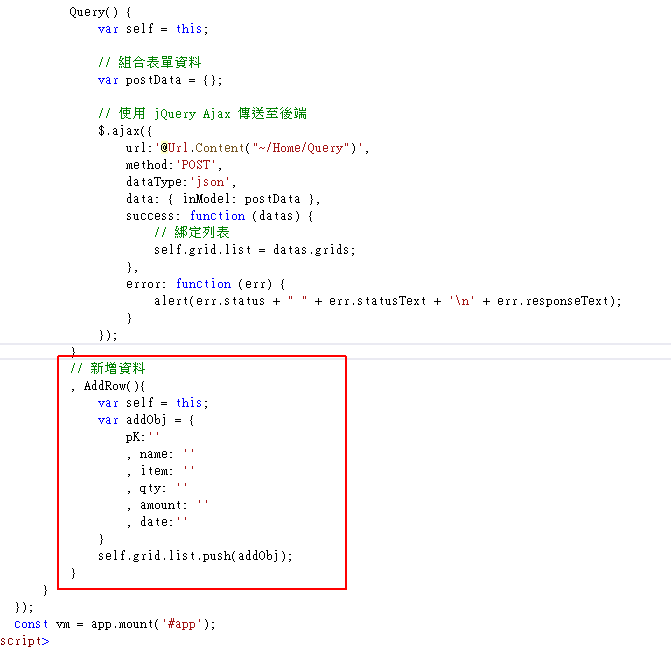
然後在 Vue3 增加一個方法:
|
1 2 3 4 5 6 7 8 9 10 11 12 13 |
// 新增資料 , AddRow(){ var self = this; var addObj = { pK:'' , name: '' , item: '' , qty: '' , amount: '' , date:'' } self.grid.list.push(addObj); } |
刪除資料
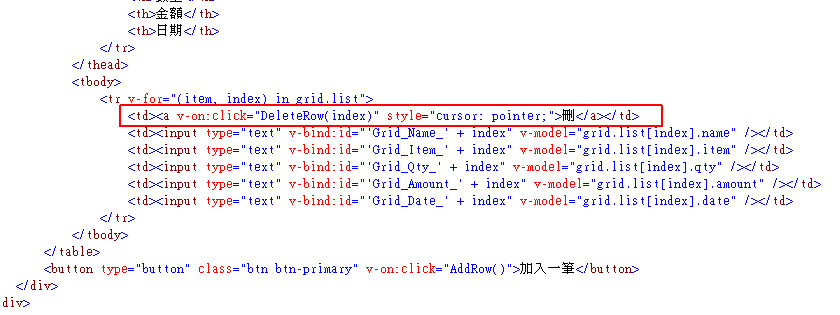
在列表我有增加一個「刪」的按鈕,增加此按鈕的執行方法為 DeleteRow(),調整語法為:
<td><a v-on:click="DeleteRow(index)" style="cursor: pointer;">刪</a></td>
然後在 Vue3 增加一個方法:
|
1 2 3 4 5 6 7 |
// 刪除資料 , DeleteRow(index){ var self = this; if (confirm("是否確定刪除資料?")) { self.grid.list.splice(index, 1); } } |
在這裡我們做了新增和刪除,而修改則直接修改欄位值就可以了,因為呈現的時候直接放在 Textbox 裡面了。
這裡在畫面上增修刪的資料,都只在 JavaScript 上調整而已,還沒寫入資料庫。
更新至資料庫
接著實作最重要的功能,將畫面新增、修改或刪除的資料,異動至資料庫裡面。
將畫面上的「更新至資料庫」加上執行方法 UpdateToDb()
<button type="button" class="btn btn-primary" v-on:click="UpdateToDb()">更新至資料庫</button>
在 Vue3 增加此方法:
|
1 2 3 4 5 6 7 8 9 10 11 12 13 14 15 16 17 18 19 20 21 22 |
// 更新至資料庫 , UpdateToDb(){ var self = this; // 組合表單資料 var postData = {}; postData['grids'] = self.grid.list; // 使用 jQuery Ajax 傳送至後端 $.ajax({ url:'@Url.Content("~/Home/UpdateToDb")', method:'POST', dataType:'json', data: { inModel: postData , __RequestVerificationToken: $('@Html.AntiForgeryToken()').val()}, success: function (datas) { alert(datas.msg); }, error: function (err) { alert(err.status + " " + err.statusText + '\n' + err.responseText); } }); } |
Controller 語法
執行 View 方法後會呼叫 ~/Home/UpdateToDb,在 \Controllers\HomeController.cs 加入以下 Action:
|
1 2 3 4 5 6 7 8 9 10 11 12 13 14 15 16 17 18 19 20 21 22 23 24 25 26 27 28 29 30 31 32 33 34 35 36 37 38 39 40 41 42 43 44 45 46 47 48 49 50 51 52 53 54 55 56 57 58 59 60 61 62 63 64 65 66 67 68 69 70 71 72 73 74 75 76 77 |
/// <summary> /// 更新至資料庫 /// </summary> /// <returns></returns> [ValidateAntiForgeryToken] public IActionResult UpdateToDb(UpdateToDbIn inModel) { UpdateToDbOut outModel = new UpdateToDbOut(); // 資料庫連線字串 IConfiguration Config = new ConfigurationBuilder().AddJsonFile("appSettings.json").Build(); string connStr = Config.GetConnectionString("SqlServer"); // 先取得原有資料庫內資料 SqlConnection conn = new SqlConnection(connStr); string sql = @"SELECT Pk,Name, Item, Qty, Amount, CONVERT(varchar(12),Date,111) AS Date FROM Sale ORDER BY PK"; var orgSale = conn.Query<SaleModel>(sql);// 使用 Dapper 查詢 //如果 Pk 欄位為空值則新增 foreach (SaleModel newSale in inModel.grids) { if (string.IsNullOrEmpty(newSale.PK)) { sql = @"INSERT INTO Sale([Name], Item, Qty, Amount, [Date]) VALUES (@Name, @Item, @Qty, @Amount, @Date)"; var param = new { Name = newSale.Name, Item = newSale.Item, Qty = newSale.Qty, Amount = newSale.Amount, Date = newSale.Date, }; conn.Execute(sql, param);// 使用 Dapper } } // 如果 Pk 值存在於原始資料則更新資料 foreach (SaleModel newSale in inModel.grids) { if (orgSale.Any(w => w.PK == newSale.PK)) { sql = @"UPDATE Sale SET [Name] = @Name, Item = @Item, Qty = @Qty, Amount = @Amount, [Date] = @Date WHERE Pk = @Pk"; var param = new { Name = newSale.Name, Item = newSale.Item, Qty = newSale.Qty, Amount = newSale.Amount, Date = newSale.Date, Pk = newSale.PK }; conn.Execute(sql, param);// 使用 Dapper } } //如果原始資料不存在輸入的 Grid 則刪除 foreach (SaleModel sale in orgSale) { if (!inModel.grids.Any(w => w.PK == sale.PK)) { sql = @"DELETE FROM Sale WHERE Pk = @Pk"; var param = new { Pk = sale.PK }; conn.Execute(sql, param);// 使用 Dapper } } outModel.msg = "全部更新完成"; return Json(outModel); } |
此方法收到 View 的 Grid 物件後,檢查是否需要新增、修改和刪除的動作。
ViewModel 語法
在呼叫 UpdateToDb 所傳入的物件及回傳的物件,需要在 HomeViewModel 內新增此類別。
開啟 \Models\HomeViewModel.cs 然後加入這 2 個新類別:
|
1 2 3 4 5 6 7 8 9 |
public class UpdateToDbIn { public List<SaleModel> grids { get; set; } } public class UpdateToDbOut { public string msg { get; set; } } |
測試程式
按 <F5> 執行專案後,就可以直接在畫面上增修刪資料,然後按「更新至資料庫」寫入 DB。
範例下載
相關學習文章
- [ASP.NET Core MVC + Vue3] 統一欄位格式定義及驗證設計範例 – 後端驗證 #CH1
- [ASP.NET Core MVC + Vue3 + Dapper] 前後台網站公告範例 – 後台查詢頁面教學 #CH1
- [ASP.NET MVC] 使用 AOP 驗證系統功能執行權限
如果你在學習上有不懂的地方,需要諮詢服務,可以參考站長服務,我想辨法解決你的問題
如果文章內容有過時、不適用或錯誤的地方,幫我在下方留言通知我一下,謝謝
![[ASP.NET Core MVC + Vue3] 動態列表及修改教學](https://blog.hungwin.com.tw/wp-content/uploads/2022/05/aspnet-core-mvc-dynamic-grid-edit.png)
